The beauty industry is witnessing a major shift: more people than ever are choosing DIY hair extensions for their styling needs. Whether you’re drawn to the convenience of self-installation, the cost-saving benefits, or the freedom to experiment with styles anytime, do-it-yourself hair extensions have become a game-changer for everyone from beginners to experienced stylists. The best part? Weaves are incredibly versatile, protect your natural hair when installed properly, and give you salon-quality results without the salon price tag. At The NiCa Collection, we believe everyone deserves access to premium hair options that work with their lifestyle, and that’s exactly what DIY weaves offer.
What Are Weaves & Why Choose DIY?
Weaves, also known as hair extensions, are strands of natural or synthetic hair attached to your own hair using various methods. Whether clipped, sewn, glued, or halo-styled, weaves seamlessly blend with your natural hair to create length, volume, and style versatility. The beauty of DIY hair extensions lies in their beginner-friendly nature; many options require zero professional help.
For those new to extensions, clip-in weaves are your best starting point. They attach via small clips along a weft (the base of the extension), making them incredibly simple to apply and remove. You control the process, your timeline, and your budget. No appointments. No waiting. Just beautiful, styled hair whenever you want it.
If you’re seeking flexibility without breaking the bank, DIY extensions check every box. You’ll save on salon costs, enjoy the convenience of styling at home, and have the freedom to experiment with different looks throughout the week.
Why Choose Easy Hairdos to Do Yourself with Weaves?
The benefits of choosing easy hairdos to do yourself with weaves extend far beyond convenience. Here’s what makes them a smart choice:
- Time-Saving Flexibility – Instead of booking salon appointments weeks in advance, you can install extensions in 15–30 minutes at home. Swap styles whenever inspiration strikes, no waiting, no rescheduling.
- Salon-Free Styling Freedom – Create your own looks without depending on stylist availability. Whether it’s a Monday morning ponytail or a Friday night waves moment, you’re in complete control.
- Natural Hair Protection – When installed properly, weaves actually protect your natural hair from daily styling damage. You’re protecting your lengths while still enjoying beautiful, styled looks.
- Budget-Friendly Beauty – Premium extensions cost less when you skip professional installation fees. The money you save can go toward better quality hair that lasts longer and looks more natural.
- Quick Style Transformations – Want to go from sleek to wavy to voluminous without heat damage? Weaves make it possible. You can achieve multiple looks with a single set of extensions, maximizing your investment.
Best Types of DIY Hair Extensions for Beginners
Not all extensions are created equal, especially when you’re just starting. Here are the easiest types to install yourself:
Clip-In Weaves
Clip-in extensions are the gold standard for beginners because they’re literally the easiest option available. Small plastic clips attach to your hair section by section, no glue, no sewing, no complicated procedures.
Why they’re perfect for beginners:
- Install in 10–15 minutes
- Reusable for months with proper care
- Zero commitment, remove them anytime
- Minimal risk of damage when used correctly
- Perfect for testing different styles before committing
Halo Weaves
Halo extensions sit like an invisible crown on your head, held in place by a thin wire that hooks into your hair. There’s no glue, no clips, and no sewing, just instant volume and length.
Why they’re beginner-friendly:
- Literally no tools needed beyond the extension itself
- Apply in under 5 minutes
- No risk of tension or traction damage
- Incredibly comfortable for all-day wear
- Perfect for anyone nervous about traditional installation methods
Quick Weaves
Quick weaves use a glue-based or cap method to temporarily attach extensions, offering a middle ground between clip-ins and permanent installs. They typically last 2-4 weeks, making them great for short-term style experiments.
What makes them beginner-accessible:
- Professional results without professional pricing
- Lasts longer than clip-ins
- Can be styled more aggressively than temporary options
- Affordable installation materials
- Removable without professional help (with patience and care)
Crochet Weaves
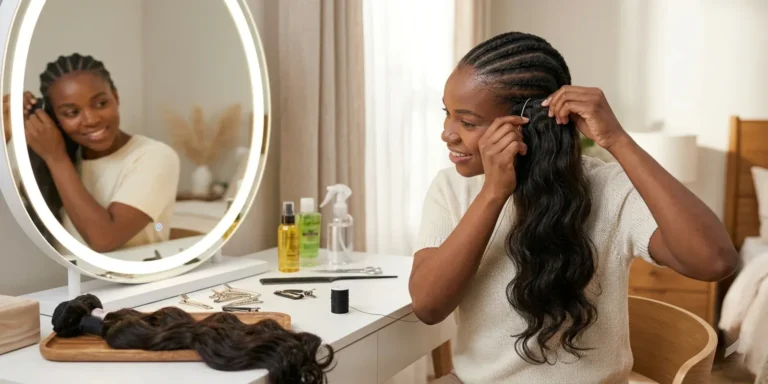
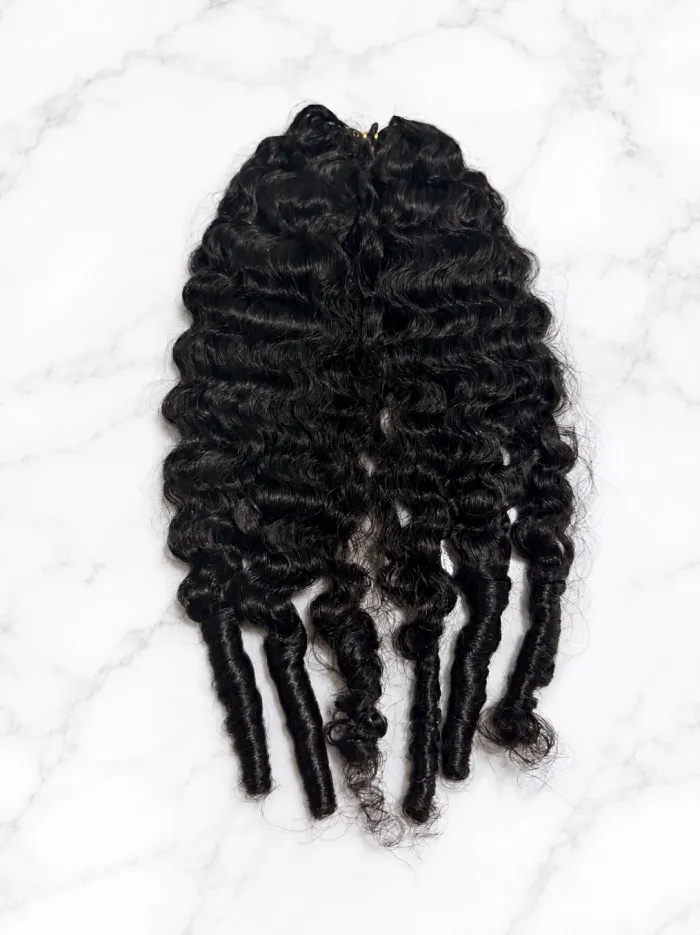
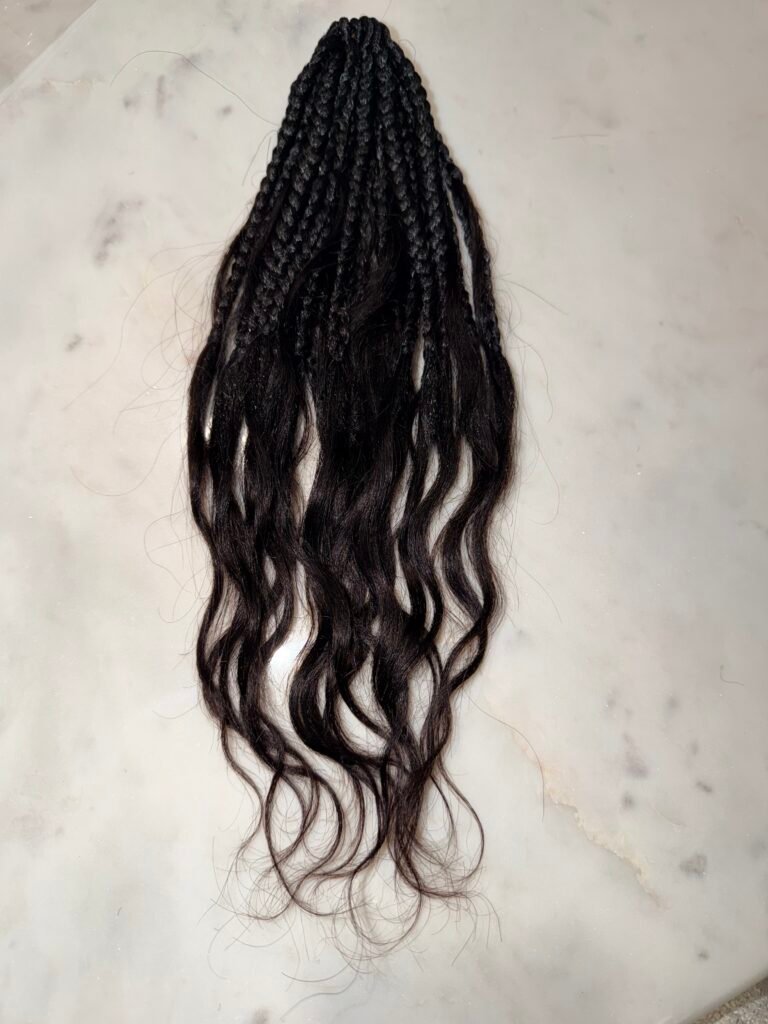
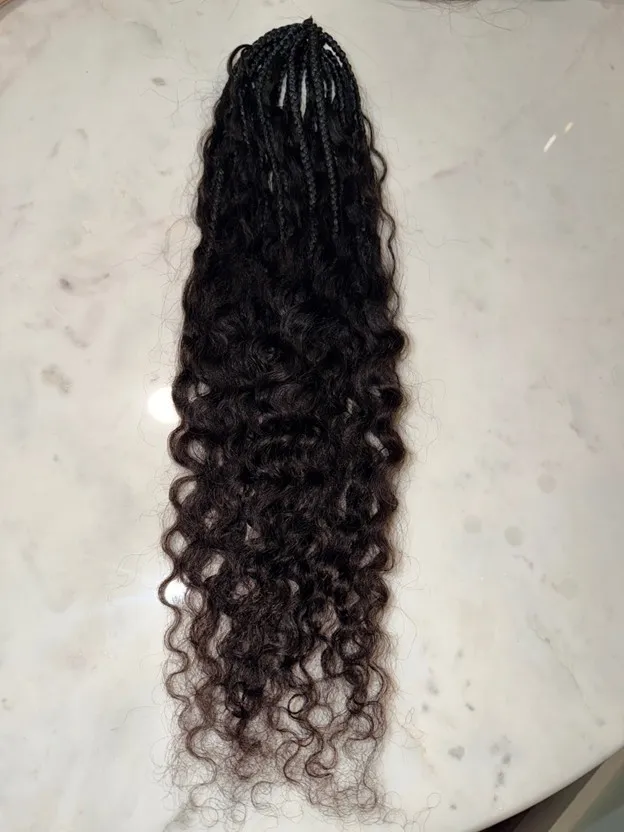
Crochet weaves are one of the most beginner-friendly protective styles for self-installation. The process involves braiding your natural hair into cornrows and using a crochet hook to loop pre-made hair extensions through the braids. They offer a salon-quality look without requiring advanced styling skills.
Why they’re perfect for beginners:
- Faster installation than traditional sew-in weaves
- No sewing thread or professional techniques required
- Available in curly, wavy, straight, and braided textures
- Lightweight and comfortable for long-term wear
- Protective style that helps reduce daily hair manipulation
- Easy to maintain and refresh at home
Step-by-Step Guide: How to Install DIY Hair Extensions
Here’s a straightforward process for installing your do-it-yourself hair extensions at home:
Step 1: Prepare Your Hair
Start with clean, dry hair. Wash your hair the night before installation to avoid excess product buildup on your scalp. Once dry, detangle completely using a wide-tooth comb, working from ends to roots.
Step 2: Section Your Hair
Divide your hair into 4-6 manageable sections using clips:
- Create a horizontal line from ear to ear across the back
- Divide the back section into 2-3 subsections
- Create 1-2 side sections
- Leave the top section unclipped for now
Step 3: Attach Extensions by Section
Starting with the lowest back section, unclip a small subsection of your natural hair (about 1-2 inches thick). Snap the extension clip firmly onto this section, close to the roots but not touching your scalp.
Work your way up the back, then move to the sides. The upper sections should blend with your natural hair on top, creating a seamless look.
Step 4: Blend and Style
Once all pieces are installed, let down your natural hair from the top and style everything together. Use a curling iron, straightener, or your favorite styling product to blend the extensions seamlessly with your natural hair.
Blending checklist:
- Ensure no visible clips
- Smooth any visible seams
- Match the texture of extensions to your natural hair
- Add volume where needed
Step 5: Set Your Style
Apply your preferred styling products (heat protectant, serum, hairspray) and enjoy your new look. You’re done!
Easy Hairdos to Do Yourself Using Weaves
One of the best parts about extensions? The styling possibilities are endless. Here are some of our favorite easy hairdos to do yourself with weaves:
Ponytail with Extensions
The ponytail is the ultimate quick style, and weaves make it look fuller and more glamorous instantly.
How to create the perfect ponytail with extensions:
- Gather all hair (natural + extensions) at your desired height
- Secure with an elastic band
- Take a small section from the ponytail and wrap it around the base to hide the elastic.
- Pin the wrapped section and set with hairspray.
This style works for everything from casual gym days to elegant nights out.
Loose Waves Look
Soft, flowing waves are the most universally flattering style, and extensions make them look magazine-worthy.
Creating loose waves with human hair weaves:
- Use a 1.25-1.5-inch curling iron
- Curl sections away from your face
- Let the waves cool completely before running your fingers through them
- Use a light texturizing spray for hold
The best part? Human hair extensions respond beautifully to heat styling, so your waves look natural and touchable.
Buns and Updos
Whether it’s a sleek high bun or a messy low knot, extensions add the volume needed for Instagram-worthy updos.
Quick bun hack: Gather all hair into a ponytail, twist, and wrap around the base. Secure with bobby pins and add a hair cuff or accessory to hide any gaps. Extensions fill out updos naturally, eliminating the need for hair padding.
Half-Up Styles
Perfect for showing off both length and your natural texture, half-up styles are effortlessly chic with extensions.
How to style:
- Section the top half of your hair
- Secure with a clear elastic or decorative clip
- Leave the bottom half down with waves or straightened
- Add a second clip or bobby pins for security
The contrast between your natural hair and extensions creates beautiful dimension.
Tips for Maintaining DIY Hair Extensions
Your extensions are an investment; treat them that way. Proper care extends their lifespan from weeks to months.
Washing Your Extensions
- Wash after 10-15 wears or when product buildup occurs
- Use sulfate-free shampoo and lukewarm water
- Condition from mid-length to ends (avoid the roots/clips)
- Gently detangle while wet using a wide-tooth comb
- Allow to air-dry or blow-dry on low heat
Conditioning and Moisturizing
- Deep condition every 2 weeks for human hair extensions
- Use leave-in conditioner between washes
- Synthetic hair needs a specialized synthetic conditioner
- Focus moisture on the mid-lengths and ends
Storage
- Store in a cool, dry place away from direct sunlight
- Keep on a hanger or in an extension organizer
- Avoid humidity and heat exposure when not wearing
- Store flat or coiled, never crumpled or tangled
Expected Lifespan
- Clip-in extensions: 6-12 months with proper care
- Quick weaves: 2-4 weeks before removal
- Halo extensions: 12+ months (nearly permanent if maintained)
Proper maintenance isn’t just about longevity; it’s about keeping your extensions looking beautiful every single time you wear them.
Common Mistakes to Avoid with Do-It-Yourself Hair Extensions
Learning what not to do is just as important as learning the right techniques. Here are the mistakes that can compromise your results:
- Poor Blending – Leaving visible clips, mismatched textures, or obvious seams ruins the entire look. Always take time to style your natural hair with your extensions, ensuring seamless integration.
- Choosing the Wrong Texture or Shade – Matching your extensions to your natural hair is crucial. If your hair is wavy and you buy straight extensions, they’ll look obviously fake. Test shade matches in natural lighting before purchasing.
- Overusing Glue or Adhesive – Excess glue can damage your natural hair and make removal painful. Use only the recommended amount for your extension type; less is more.
- Excessive Tension – Pulling your hair too tight, especially with heavy extensions, can cause traction alopecia (hair loss from prolonged tension). Secure extensions firmly but never painfully tight.
- Sleeping in Clip-In Extensions – While tempting, sleeping in clip-ins causes tangling, breakage, and potential scalp irritation. Remove them before bed and store properly.
- Neglecting Maintenance – Skipping washes, conditioning, and proper storage quickly ruins extensions. Create a maintenance routine and stick to it.
- Using Wrong Products – Sulfate-heavy shampoos, silicone-based products, and alcohol-containing sprays can damage extensions. Invest in extension-friendly hair care.
How to Choose the Right Weave for Your Hair Type
Not every extension works for every person. Here’s how to find your perfect match:
Texture Matching
- Straight hair: Choose straight extensions or slightly wavy for versatility
- Wavy hair: Match with a similar wave pattern for seamless blending
- Curly hair: Curly extensions blend best, though coily extensions add drama
- Coily/Textured hair: Seek curly or coily extensions for authentic integration
Human Hair vs. Synthetic
| Aspect | Human Hair | Synthetic |
| Durability | Lasts longer (6-12+ months) | 2-4 months typically |
| Styling | Heat styleable, versatile | Limited heat tolerance |
| Natural Look | Most natural appearance | Can appear shiny/plastic |
| Maintenance | Requires regular care | Lower maintenance |
| Cost | Higher investment | Budget-friendly |
| Color Options | Endless possibilities | Pre-set colors |
Human hair extensions offer superior quality and a more natural look, making them worth the investment if the budget allows. Premium raw hair bundles, especially from trusted vendors like those featured at The NiCa Collection, maintain their beauty and texture for extended periods.
Length and Density Considerations
- Length: Choose 2-4 inches longer than your desired finished length (extensions compress slightly when installed)
- Density: Match your natural hair’s thickness, lighter density for fine hair, fuller density for thick hair
- Weight: Heavier extensions need secure clips or sturdy attachment methods
Final Thoughts: Best DIY Hair Extensions for Effortless Styling
DIY hair extensions have democratized beautiful hair. You no longer need a professional stylist, a large budget, or endless time commitments to rock gorgeous lengths and styles. Whether you’re choosing clip-in extensions for their simplicity, halo weaves for their speed, or quick weaves for their lasting power, the key is finding what works for your lifestyle and hair type.
The versatility of weaves means you can create easy hairdos to do yourself, from sleek ponytails to flowing waves to voluminous updos, all at home, on your schedule. With proper installation, maintenance, and care, your extensions will look beautiful for months to come.
At The NiCa Collection, we’re committed to connecting you with premium, verified hair vendors who stand behind their products. Explore our curated marketplace to find extensions that match your texture, length, and style vision. Whether you’re a first-timer or a seasoned extension wearer, you deserve access to quality hair that makes you feel confident and beautiful.
Ready to start your DIY extension journey? Browse our collection of premium weaves and find your perfect match today. Your best-looking hair is just a few clips away.
FAQ: DIY Hair Extensions & Easy Hairdos
Q: What are the easiest DIY hair extensions for beginners?
Clip-in and halo weaves are the simplest for beginners. Clip-ins require no glue or sewing, just snap them into place in 10-15 minutes. Halo extensions are even faster, applying in under 5 minutes without any tools. Both offer zero commitment and minimal damage risk, making them perfect starting points.
Q: Are do-it-yourself hair extensions safe for natural hair?
Yes, when installed and removed correctly. Proper installation prevents damage by distributing weight evenly and avoiding excessive tension. Key safety measures include using appropriate clips, avoiding tight styles, removing extensions before bed, and following the recommended maintenance schedule. Never pull too tightly or leave extensions in too long without removal breaks.
Q: How long do DIY hair extensions last?
Lifespan depends on type and care. Clip-in extensions last 6-12 months, quick weaves last 2-4 weeks, and halo extensions last 12+ months. Proper maintenance, gentle washing, conditioning, and careful storage significantly extend longevity. Human hair extensions typically last longer than synthetic options when properly cared for.
Q: Can I create easy hairdos to do myself using weaves daily?
Absolutely. Extensions enable endless daily styling: ponytails, buns, waves, half-up styles, and more. Versatility is one of their biggest advantages. However, remove clip-ins before bed and rotate styles occasionally to prevent tension on specific hair sections and maintain extension quality.
Q: What tools do I need for DIY hair extensions?
You’ll need: a wide-tooth comb, styling clips, a mirror, a straightener or curling iron for blending, and extension-friendly hair products (sulfate-free shampoo, leave-in conditioner, heat protectant). For clip-ins, you may want a hair extension organizer. Most tools are items you probably already own.
Q: Which type of DIY hair extensions looks most natural?
Human hair extensions with texture matching your natural hair look most natural. Premium raw hair processed minimally appears seamless and moves like natural hair. Match your wave pattern, density, and shade carefully. Lighter-weight clips and proper blending techniques also create more natural-looking results than visible, heavy hardware.
Q: Are DIY hair extensions better than salon installs?
Both have advantages. DIY extensions offer affordability and flexibility. You control timing, style, and costs. Salon installs provide longer-lasting results and professional expertise but cost significantly more. For beginners or those experimenting with styles, DIY clip-ins and halos offer excellent value.
Q: How do I blend do-it-yourself hair extensions with my real hair?
Blend through strategic styling: trim extensions slightly shorter than your natural hair to create layers, use a curling iron or straightener to match textures, and style both together as one cohesive unit. Proper sectioning during installation also ensures natural blending. Hair serums and texturizing sprays help achieve seamless integration.
Q: Can beginners try easy hairdos to do themselves with extensions?
Definitely yes. Many styles, such as ponytails, waves, buns, and half-ups, are beginner-friendly and require minimal styling skills. Extensions actually make beginners look like professionals because they add volume and length that create fuller, more impressive styles. Practice a few styles and build confidence naturally.
Q: How often should I wash DIY hair extensions?
Wash after 10-15 wears or when product buildup occurs. Frequent washing isn’t necessary and can fade color or dry out hair. Use gentle, sulfate-free products and lukewarm water. Between washes, use dry shampoo to refresh and dry conditioner sprays to maintain moisture.




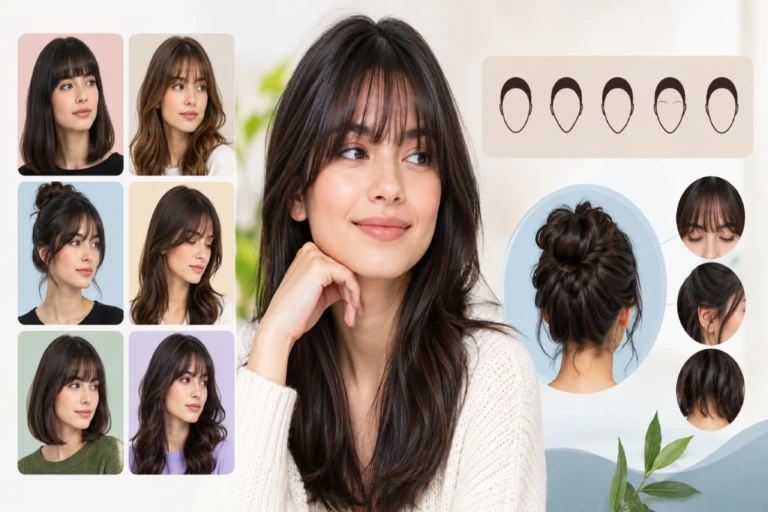
Bangs Hair: Types, Hairstyles and Face Shape Guide
Bangs hair is a section of hair at the front of the head that is cut shorter than the rest, so it falls over the forehead. In the UK and
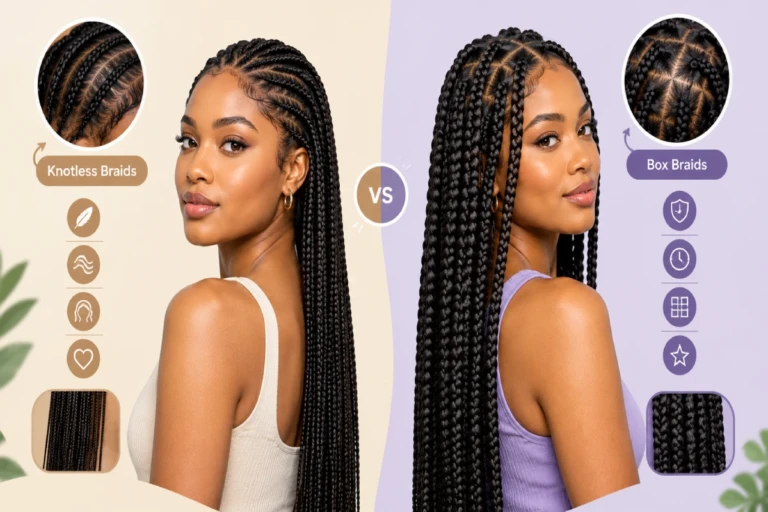
Knotless vs Box Braids: Difference, Lasting Time, Comfort and Style
The main difference between knotless vs box braids comes down to how each style starts at the root. Box braids start with a small knot that secures the extension hair
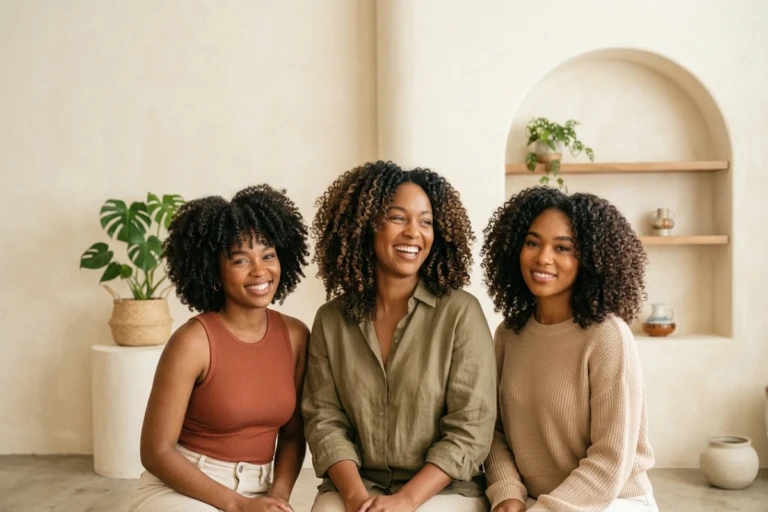
Difference Between 3C and 4A Hair: Types, Texture & Styles
If you’ve ever looked at a curl chart and felt like your hair belongs in two boxes at once, you’re in good company. 3C and 4A sit right next to